A
BEGINNERS GUIDE TO SELF-TAKE PHOTOGRAPHY, THE BASICS.
The two
most important points to concentrate on if you want to take a good self-take
image of your catch is firstly, the welfare of the fish, and secondly, being
organised.
1 – FISH
WELFARE.

Always
ensure that your catch is safe and out of harm’s way whilst setting up. This
may mean placing the fish in a landing net in the margins or another means of retention,
however never retain a fish for longer than necessary and always keep an eye on
it at all times. It also important to make sure that the unhooking mat is damp
and that a bucket of water is available to dampen the fish down. Never place a
fish on a dry mat or weight in a dry weigh sling.
2 –
ORGANISATION.

Whilst
the fish is resting (I always weigh my fish separately as scales can be a
danger to the fish if left on a mat) organise the area where the fish is to be
photograph. An important part of getting a good image is to find a good
backdrop like some rushes as an umbrella or tackle in the background doesn’t
look good. Pace the damp unhooking mat on the ground and push two bankstics in
the ground at either edge. One will hold the camera by means of a Gardner Camera
Adapter the other will have a towel placed on it to give the camera something
to focus on. I use a light green towel as if a white bag is used the camera
will feel that there is too much light and take a dark (under exposed) image
and if a black towel is used the picture will be light (over exposed). Kneel
next to the front stick and imagine holding your catch.
3 – IDIOT
MODE
 Being
creative and using more advanced settings on the camera come with time and
experience so my advice when starting out is to set the camera to what I call
‘idiot mode’. On Canon cameras this is usually a green square and what the
camera does is simply set the camera settings for you so that a good quality
image is taken.
Being
creative and using more advanced settings on the camera come with time and
experience so my advice when starting out is to set the camera to what I call
‘idiot mode’. On Canon cameras this is usually a green square and what the
camera does is simply set the camera settings for you so that a good quality
image is taken. 
4 – AUTO
FOCUS
Make sure
that the camera’s focusing switch is set to Auto Focus as this will allow the
camera to focus on the towel (position the fish will be held).
5 –
FOCUSSING.
 Look
through the camera eye piece and focus on the towel. Whilst doing this it’s
also a good to imagine the final image, you holding the fish, so try and zoom
in or out so that the final image will be acceptable. Focussing on most cameras
will be achieved by seeing a red square flash on the towel. When you are happy
with the focussing it’s very important to switch the camera’s focusing switch
to Manual as this locks the focal point on the towel. Failure to do this will
only cause problems and this is the most common reason why images are out of
focus, as if not locked it allows the camera to refocus when the self-take
button is pressed.
Look
through the camera eye piece and focus on the towel. Whilst doing this it’s
also a good to imagine the final image, you holding the fish, so try and zoom
in or out so that the final image will be acceptable. Focussing on most cameras
will be achieved by seeing a red square flash on the towel. When you are happy
with the focussing it’s very important to switch the camera’s focusing switch
to Manual as this locks the focal point on the towel. Failure to do this will
only cause problems and this is the most common reason why images are out of
focus, as if not locked it allows the camera to refocus when the self-take
button is pressed.
6 – FINAL
SETTING.
With the
camera in ‘idiot mode’ and the focal point locked it’s now time to set the
camera to self-take mode. This icon varies on different cameras but on Canon’s it’s
a broken circle with a clock like hand within.
7 –
PRACTICE SHOT.
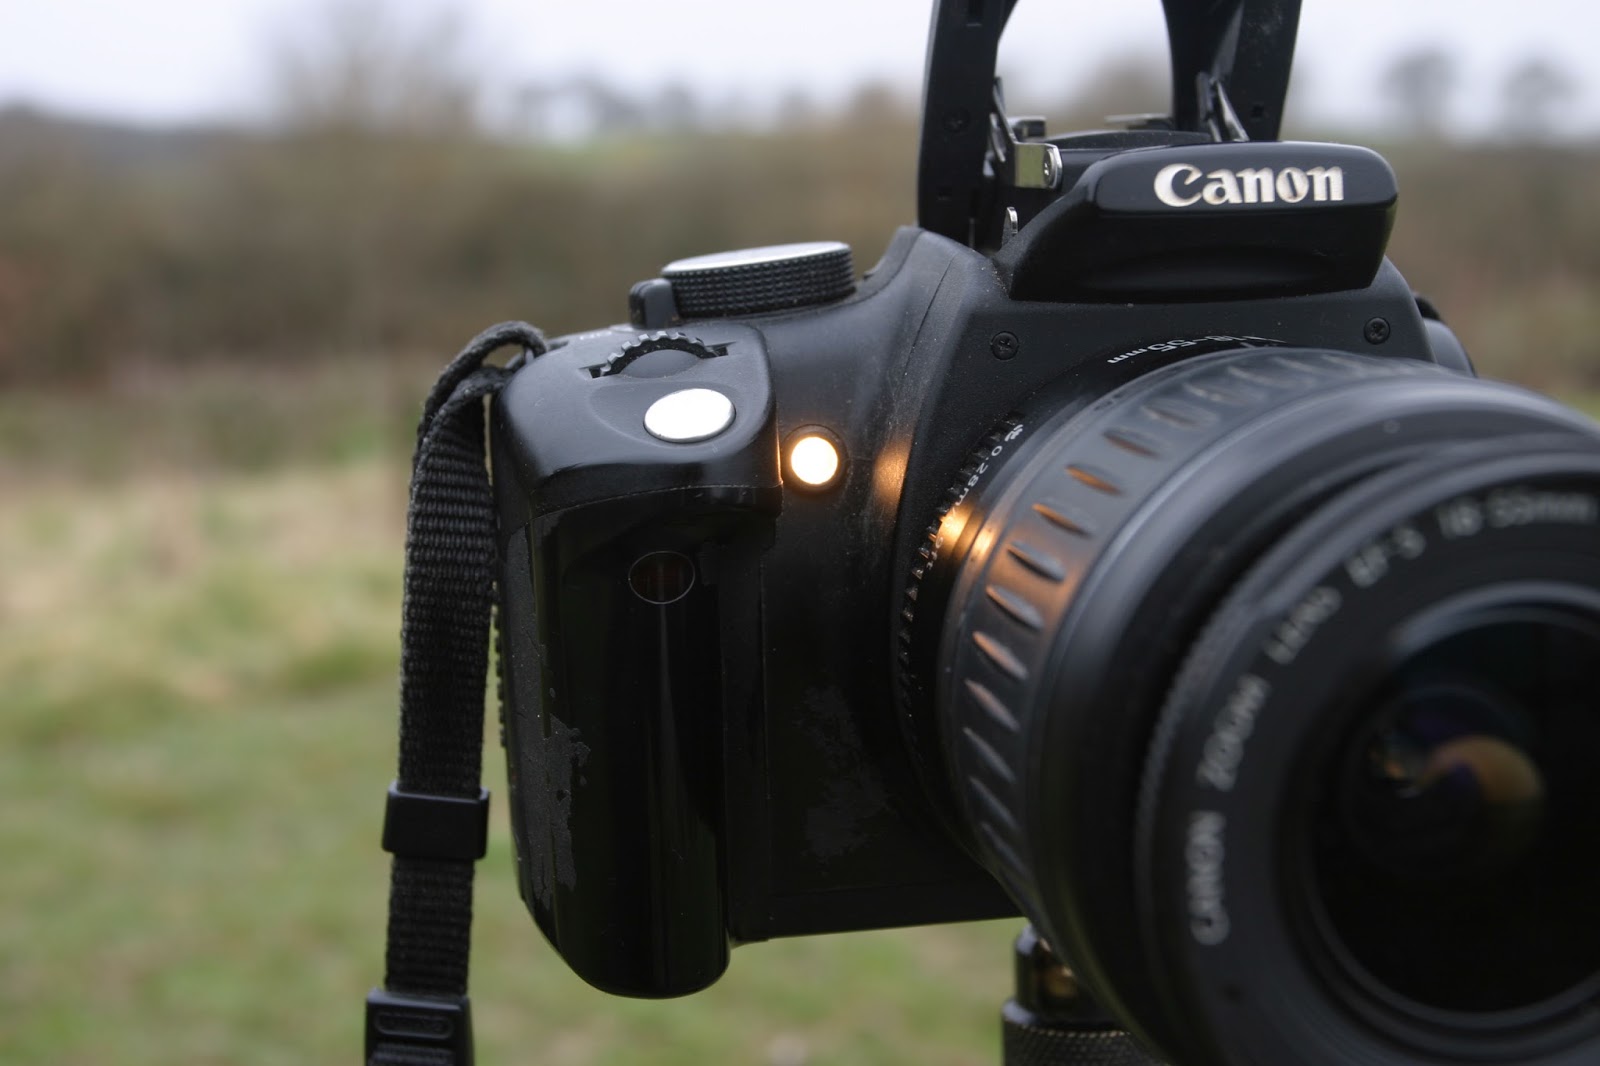
 With
everything set, lean forward and press the self-take button. A yellow timer
switch will then flash and just as the photo is about to be taken stay on
constantly. My camera is set for ten seconds as any quicker and it will mean
rushing and making a mistake.
With
everything set, lean forward and press the self-take button. A yellow timer
switch will then flash and just as the photo is about to be taken stay on
constantly. My camera is set for ten seconds as any quicker and it will mean
rushing and making a mistake.
8 –
FRAMING UP.
Whilst
the camera is flashing position yourself so your knees are touching the edge of
the mat and once again imagine you are holding the fish right where the
bankstick is. It’s very important that when you come to holding the actual fish
that it’s where this stick was positioned or right above the edge of the mat as
this will mean that the fish will be in focus. Pushing the fish forward away
from where the bankstick was will only result in the fish being out of focus!
9 – CHECK
IMAGE.
Once the
image has been taken take a look at how the framing of the image has turned
out. If whilst focusing on the towel in point 5 you imagined the final image
everything should be fine, however if you find that you have zoomed in too far
and have cut your head off then you will have to go back to step 4 and start
all over again.
 This is
where experience helps and always remember that you are not looking for the
perfect image just an acceptable image of your catch. Its far better to take an
image that’s zoomed out, one with plenty of area surrounding you and the fish
as this can then be cropped back at home on your computer.
This is
where experience helps and always remember that you are not looking for the
perfect image just an acceptable image of your catch. Its far better to take an
image that’s zoomed out, one with plenty of area surrounding you and the fish
as this can then be cropped back at home on your computer.
This
point is also where many images are taken out of focus as if the test shot
isn’t framed up well there is a tendency for the angler to readjust the framing
of the image and by doing this it affects the focal point.


10 – READY
TO GO.
Once you
know that the image will be in focus and framed up well it’s time to place the
fish on the mat, lean forward and press the self-take button.
11 –
FINAL SHOT.

 Simply
lift the fish on the same access as the edge of the mat (where the bankstick
and towel was positioned) and smile. Take three, maybe four shots before returning
the fish to the lake (still in your landing net).
Simply
lift the fish on the same access as the edge of the mat (where the bankstick
and towel was positioned) and smile. Take three, maybe four shots before returning
the fish to the lake (still in your landing net).
12 – GOOD
TO GO.
With the
fish safely back in the water it’s now time to check the image and this one is
perfect.
 13 –
RELEASE TIME.
13 –
RELEASE TIME.
If
everything has been carefully organised and the procedure followed then a
self-take image should only take a couple of minutes and cause the fish no harm.
Time to let the fish go.
14 –
PRACTICE MAKES PERFECT.

 If you do
find that your images are out of focus then it means that one or another of the
above points hasn’t been followed. Take your time, practice as much as possible
and slowly the whole procedure will become second nature. Once you are
competent then you can move on to taking night time shots or progressing into
using the creative settings on the camera, however always remember that the
fish’s welfare is paramount and far more important than the perfect picture.
If you do
find that your images are out of focus then it means that one or another of the
above points hasn’t been followed. Take your time, practice as much as possible
and slowly the whole procedure will become second nature. Once you are
competent then you can move on to taking night time shots or progressing into
using the creative settings on the camera, however always remember that the
fish’s welfare is paramount and far more important than the perfect picture.
No comments:
Post a Comment